I recently needed to configure the transports of Delivery Units between a SAP HANA, express edition, (HXE) instance in Amazon Web Services and one of my tenant databases in another HXE instance in Google Cloud Platform.
My destination HXE instance (some kind of QA environment) was originally a server-only to which I added the XS classic tools as explained in this how-to guide . The source instance plays the Dev environment in this scenario. I wanted to transport from Dev into QA without manually exporting and importing Delivery Units.
In order to configure the transports and access the ALM tools you will need the following roles in the source/Dev system:
- sap.hana.xs.lm.roles::Administrator
- hana.xs.admin.roles::HTTPDestAdministrator
- hana.xs.admin.roles::RuntimeConfAdministrator
- ALTER SYSTEM ALTER CONFIGURATION (‘xsengine.ini’, ‘database’, ‘<tenant_DB_name>‘) SET (‘public_urls’, ‘http_url’) = ‘http://<virtual_hostname>:80<instance>‘ WITH RECONFIGURE;
- ALTER SYSTEM ALTER CONFIGURATION (‘xsengine.ini’, ‘database’, ‘<tenant_DB_name>) SET (‘public_urls’, ‘https_url’) = ‘https://<virtual_hostname>:43<instance>‘ WITH RECONFIGURE;
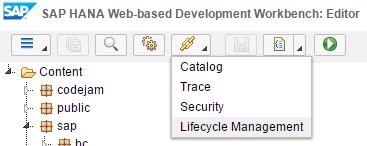
Then go into the Systems tile, as you will need to add the destination System:
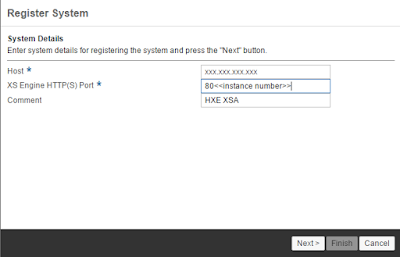
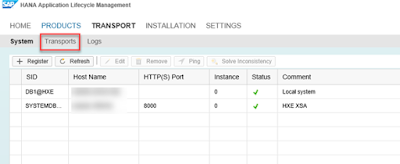
You will find the local system already there and that’s OK, you now need to register the destination system:
My instance is 00. If your instance is 90, your XS port should be 8090.
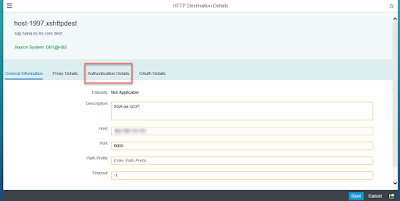
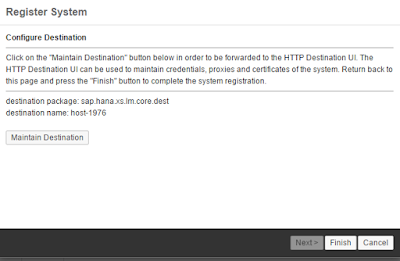
Click on Next and then on Edit, check the Host and into the Authentication Details:
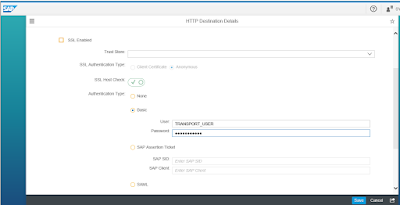
And add the user name and password for your QA system. Click on Save.
When you click on Finish, the system will try to connect to it’s counterpart.
If there are no errors, you will see the System has been registered successfully. Go into Transports to create a transport route:
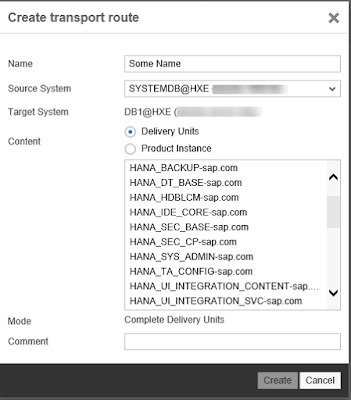
You can choose the Delivery Unit that you want to transport now, together with the destination system if you have configured more than one:
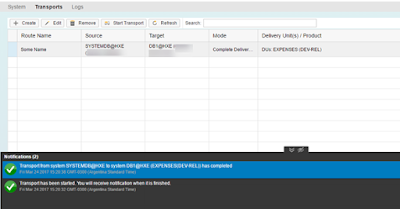
Click on Create and then on Start the transport. Once the transport is finished, you will see the results at the bottom:
I will continue to share my migration journey in later blogs and publishing them as @LuciaBlick on Twitter or as myself on Linked In, so follow me if you’re also interested in how to make your SAP HANA Express instances grow up!

No comments:
Post a Comment