Introduction
This blog details the steps to deploy your own HANA Express (HXE) Instance on Amazon Web Services (AWS).
A couple of reasons I used AWS to host a HXE instance –
HANA Express Binary Files
Register on the HANA Express site and download the binary files.
JAVA JRE 8 installation
Download the “Linux x64 RPM” file from the Java.com Downloads section.
2. Upload Installation files to AWS S3
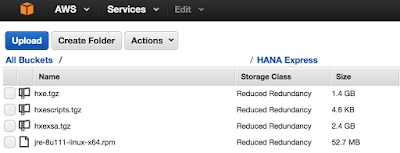
In my S3 bucket I created a folder called “HANA Express” and uploaded the installation files –
This blog details the steps to deploy your own HANA Express (HXE) Instance on Amazon Web Services (AWS).
A couple of reasons I used AWS to host a HXE instance –
- Didn’t have a computer with the recommended specs (namely the 16GB of RAM)
- Initially I tried using SAP’s Cloud Appliance Library to deploy a HXE instance but unfortunately its restricted to the region “US EAST”, which isn’t ideal from Australia.
- AWS provides a lot of flexibility and is cost effective for hosting your own HANA system
HANA Express Binary Files
Register on the HANA Express site and download the binary files.
JAVA JRE 8 installation
Download the “Linux x64 RPM” file from the Java.com Downloads section.
2. Upload Installation files to AWS S3
In my S3 bucket I created a folder called “HANA Express” and uploaded the installation files –
I also made the “HANA Express” folder public so I can easily transfer the files to my EC2 instance later. This permission can be removed after you’ve transferred the files to your EC2 instance.
3. Create Virtual Private Cloud (VPC)
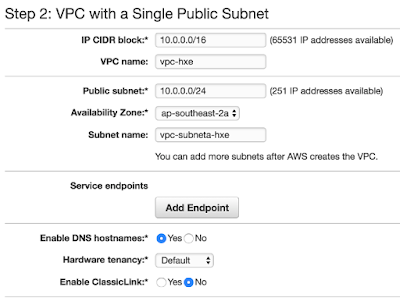
Create a simple VPC to host the HANA Express instance using AWS “Scenario 1 – VPC with a Single Public Subnet” as the template.
First select the VPC Service in AWS and then start the “VPC Wizard”
Select “Scenario 1 – VPC with a Single Public Subnet”
Enter a name for the VPC and Subnet for easier identification. If desired you can also tweak the VPC / Subnet size by adjusting the CIDR block (I left the default values)
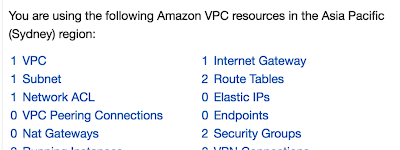
Select “Create VPC” and once complete AWS will have created all the required artifacts for your VPC.
4. Create EC2 Instance
Next step is to create an EC2 Instance to host our HXE system.
Select the EC2 service in AWS and select “Launch Instance” –
Select the AMI – “SUSE Linux Enterprise Server 12 SP 1 (HVM), SSD Volume Type”
Select the Instance Type – I would recommend “Memory Optimized” type, either r3.large or r3.xlarge.
These are the two options provided with SAP CAL. Pricing for EC2 instance types can be found at AWS EC2 Pricing
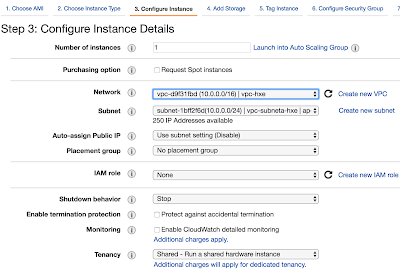
Configure the Instance – Select your VPC and Subnet created earlier –
Add Storage – Depending on your EC2 instance type you’ll need to add some additional storage. The minimum recommended storage for HANA Express is 120GB.
Add Tags – Give your EC2 Instance a key/value name to help identify it if you have multiple EC2 instances e.g. “ec2-hanaex”.
Create Security Group –
The security group copies the ports/access provided with the SAP CAL HXE instance as detailed in the Getting Started Guide.
I’ve added some additional ports TCP
30030 – 30032 for XSA
53075 – WEBIDE
Note the ports are configured to be accessible by everyone, which is obviously not a great idea 🙂 There are many options with AWS to secure your EC2 / VPC.
Review – The last step is to review and launch your instance. AWS will prompt you to create a new Key Pair (or use an existing key pair).
Download the new key pair to your computer and then your new EC2 instance will be created and launched –
5. Assign Elastic IP
To give your EC2 a static public IP/DNS, you can create and assign an “Elastic IP”
In the EC2 Service on the left-hand menu select “Elastic IPs” under the sub-menu “Network & Security”
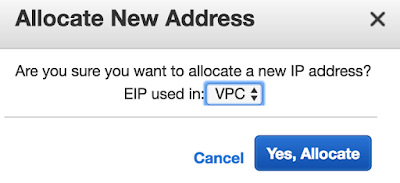
Select the “Allocate New Address” button and create a new Elastic IP using VPC –
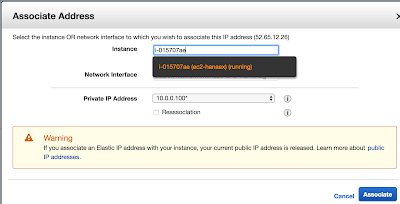
Then select your newly created Elastic IP the select the “Action” button and “Associate Address”
Select your EC2 instance and click “Associate” –
Now your EC2 instance will have a public DNS / IP Address which will remain static until you disassociate the EIP
6. Connect & Copy HXE Install Files to EC2 Instance
Connect to your EC2 Instance using your SSH client.
Navigate to the location where you downloaded the Private Key (.pem) and enter the following SSH command (substituting in the values relevant for your instance)
ssh -i “keypairname.pem” ec2-user@public.dns.name.compute.amazonaws.com
e.g.
Now you’ve connect to your instance, copy the install files in AWS S3 (from step 2) to your EC2 instance –
Navigate to the “Root Directory”
Create a folder called “install_files”
Change directory to the “install_files
Use wget to transfer the install files from S3 to EC2
The commands are below –
Note the URL for each file is in the file properties in AWS S3.
After you’ve transferred the files from S3 the “install_files” folder should contain the following files –
7. Install HANA XE Prerequisites
Install JAVA JRE 8
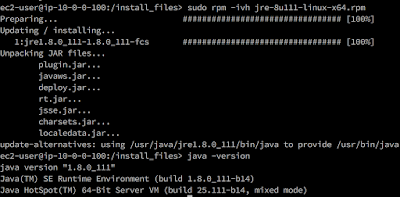
Run the command from the “install_files” directory to install JAVA JRE 8 –
sudo rpm -ivh jre-8u111-linux-x64.rpm
After doing so you can run the command “java – version” to confirm the JRE installed correctly
Install OpenSSL 0.9.8
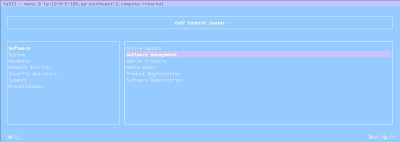
Run Yast with the command below –
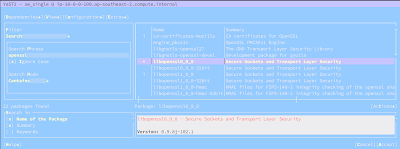
Select “Software” -> “Software Management”
Search for “openssl” and on the results on select the package named “libopenssl0_9_8” so the “+” symbol appears. This means the package will be installed –
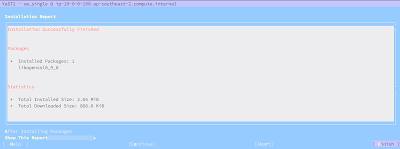
Choose “Accept” and the OpenSSL 0.9.8 package will be installed
Install Libtool Runtime Library
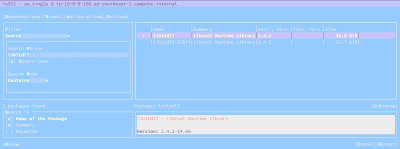
Found my original installation failed without this installed. Following the same steps as OpenSSL, install the “libltdl7” package
8. Update the Hostname
When creating the EC2 instance AWS defaults the hostname which is derived from the EC2 instance Private IP of e.g.
This caused issues with my first installation of HXE because the above private DNS isn’t accessible from the internet. I could access some services using the public DNS however when logging onto the WebIDE of HXE it would redirect to XS UAA (auth service) using the private DNS. This would fail because the private DNS can’t be access from the internet.
To get around this issue I updated the hostname of the EC2 Instance to match the Elastic IP I attached to the EC2 instance.
Steps to do this are –
Run YAST and select
Network Services -> Hostnames
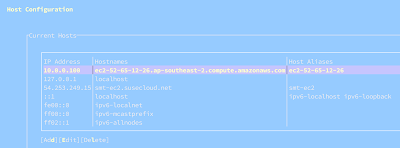
Add a new entry –
IP Address = Private IP Address of EC2 instance
Hostname = Public DNS of your EC2 Instance which is derived from your Elastic IP
Host Alias = Public Hostname derived from your Elastic IP
e.g.
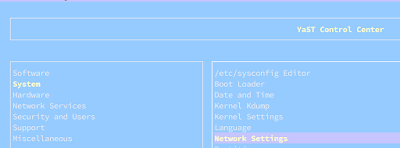
Now Navigate to the Main Yast menu and select
System -> Network Services
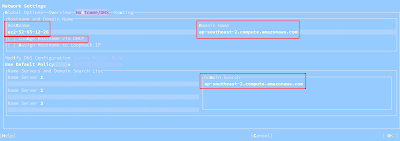
Select the “Hostname/DNS” tab and update the hostname and domain accordingly –
Also uncheck the “Change Hostname via DHCP”
e.g.
Save and close Yast.
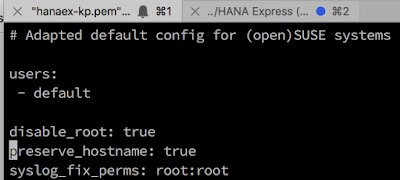
Now update the cloud.cfg file to preserve the hostname after each restart.
From the command line run the following –
Update the line with “preserve_hostname:” to “true”
Save / Exit cloud.cfg
Reboot your EC2 Instance.
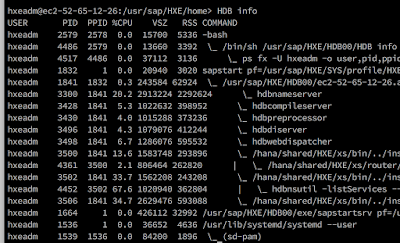
After logging back in EC2 hostname should have updated similar to below –
9. Install HANA Express
You’re now ready to install the HANA Express server.
I personally found the video tutorial easier to follow.
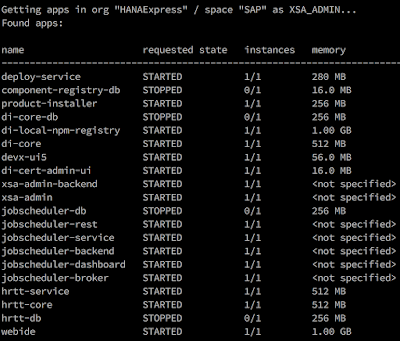
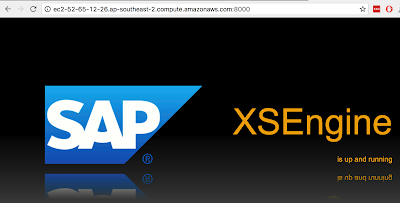
Congratulations, you’ve now got your own personal HANA Express instance running on AWS!
Source: go.sap.com







No comments:
Post a Comment